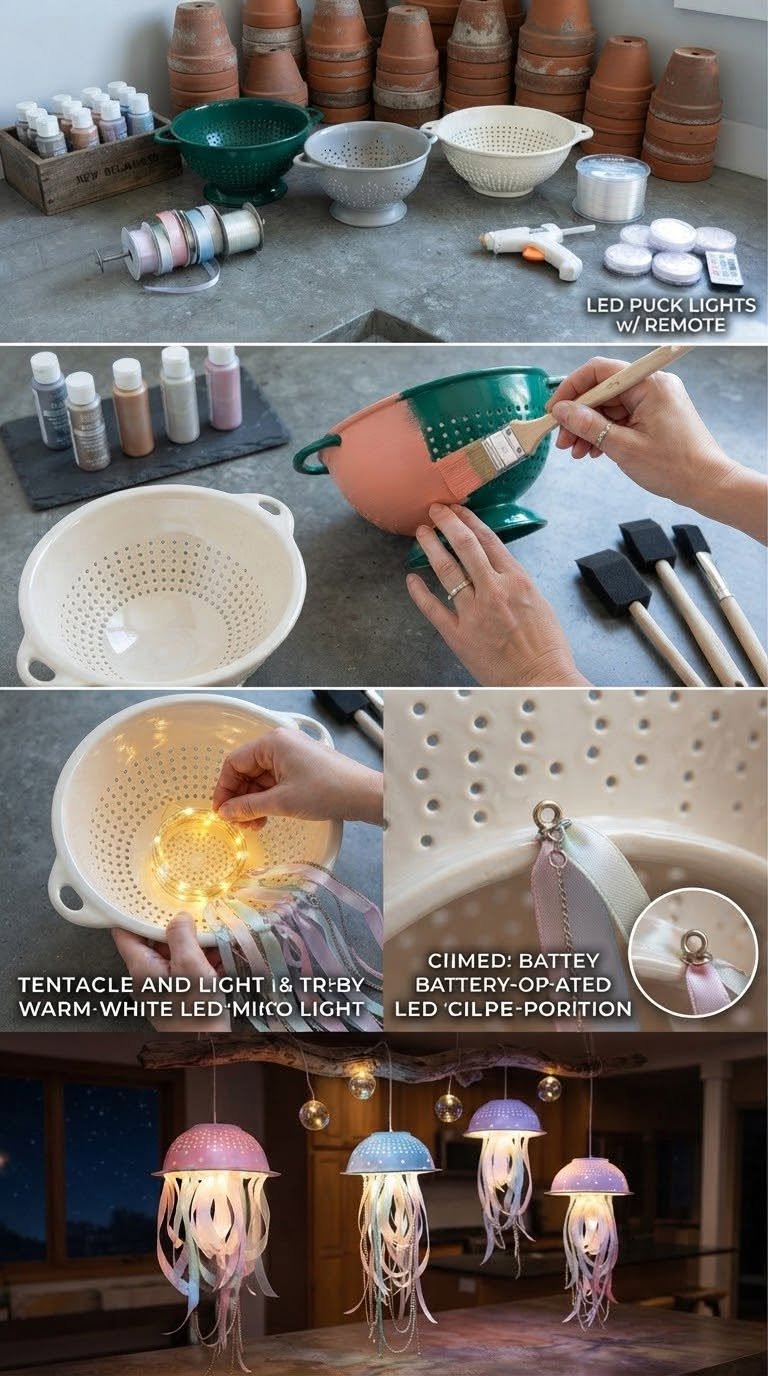
Looking for a creative DIY project that transforms ordinary household items into something magical? These glowing DIY colander jellyfish lights are a fun and imaginative way to create unique decorations for your home, garden party, or themed celebration.
Inspired by the graceful movement of jellyfish underwater, this handmade craft combines a simple colander, soft glowing lights, and flowing ribbons or strings to create a whimsical ocean-inspired display. The finished decoration looks beautiful in a child’s bedroom, at a summer party, or as part of an under-the-sea themed event.
Best of all, you can make this project with inexpensive materials and a little creativity!
Materials You’ll Need
- 1 lightweight plastic colander in your preferred color
- 1 battery-operated LED string light or LED fairy lights
- Several lengths of ribbon, yarn, crepe paper, or lightweight fabric strips
- Clear fishing line or strong string for hanging
- Scissors
- Craft glue or tape suitable for your materials
- Optional: translucent ribbons, glow-effect decorations, or ocean-themed embellishments
Safety tip: Use cool-running, battery-operated LED lights rather than candles or hot incandescent bulbs. Keep batteries and small decorative pieces away from young children.
Step-by-Step Instructions
Step 1: Prepare the Colander
Choose a clean, lightweight colander to serve as the jellyfish’s dome-shaped body. Turn it upside down so the rounded exterior resembles the top of a jellyfish.
If you want a colorful decoration, choose a blue, pink, purple, or white colander that complements your room or party theme.
Step 2: Create the Jellyfish Tentacles
Cut your ribbons, yarn, or crepe paper into strips of different lengths. Varying their lengths creates a more natural underwater appearance.
Choose complementary colors such as turquoise, lavender, pale blue, white, or iridescent silver. You can also mix several colors for a playful rainbow effect.
Step 3: Attach the Tentacles
Secure the strips around the rim of the upside-down colander using suitable craft glue or tape. Space them evenly around the edge so they hang freely.
For a fuller jellyfish appearance, layer several lightweight strips together. Allow the tentacles to move gently when air circulates around them.
Let any adhesive dry completely before continuing.
Step 4: Add the Glowing Lights
Carefully arrange battery-operated LED fairy lights inside or around the colander. Use the holes in the colander to help position the lights, securing the wire where necessary.
For the prettiest effect, choose cool white, blue, purple, or color-changing LEDs. Position the battery pack so it remains accessible and does not weigh down the decoration.
Keep the battery pack outside the colander if needed, and follow the manufacturer’s instructions for safe use.
Step 5: Attach the Hanging Line
Tie three equally spaced lengths of strong string or fishing line to secure points on the colander. Bring the lines together above the dome and tie them into a single hanging loop.
Make sure the decoration hangs level and that the attachment points can support its weight.
Step 6: Switch on the Lights
Turn on the LED lights and gently spread the tentacles so they flow freely around the jellyfish’s body.
Dim the surrounding lights to enjoy the glowing effect. The illuminated dome and dangling ribbons create a dreamy underwater atmosphere.
Step 7: Display Your DIY Jellyfish Lights
Hang your finished creation from a secure hook or display it as part of a larger ocean-themed arrangement.
For a dramatic look, make several jellyfish in different colors and hang them at varying heights.
Creative Ways to Customize Your Jellyfish Lights
For Complete Cooking STEPS Please Head On Over To Next Page Or Open button (>)